How to fit a Lockwood 001 Deadlatch
I would like to give some information on how to install a Lockwood 001 deadlatch. This is one of the most popular security locks installed in Brisbane. They can be a strong lock that can withstand a lot of force if fitted correctly. Often we see them not fitted correctly and i would hope with a little bit of information this can improve. These instructions is the same for a Lockwood deadlatch with a key on the inside and for the lever handle variant.
The Lock Mob locksmith Toowong are a Brisbane based locksmith and security advisors. Contact us for any locks, key and security problem you may have.
We will look at how to fit the lock to a door, then we will show how to fit the wood frame strike, and finally the metal frame strike.
I will stress from the start that the lock and the strike is to be fitted on the same surface plane. With a wooden frame door this will usually mean the strike will be set into the frame to the depth of inside of the closed door.
Installing the Lockwood 001 deadlatch

First decide the height on the door the lock is to be fitted.
Measure back 60 mm from the edge of the door.
This will be where we make the hole for the outside cylinder.
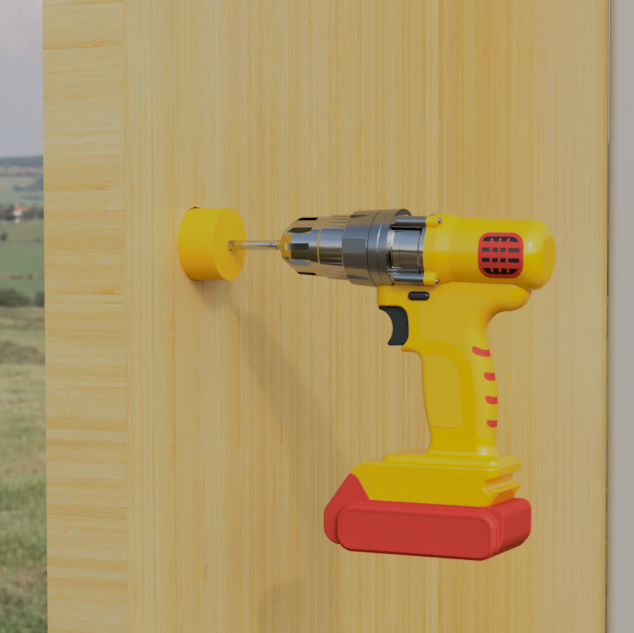
Using a drill with a 32 millimeter hole saw make the cylinder hole in the door.
Make the holesaw cut from from both sides of the door.
If you drill only from only one side, the wood on the door may split.

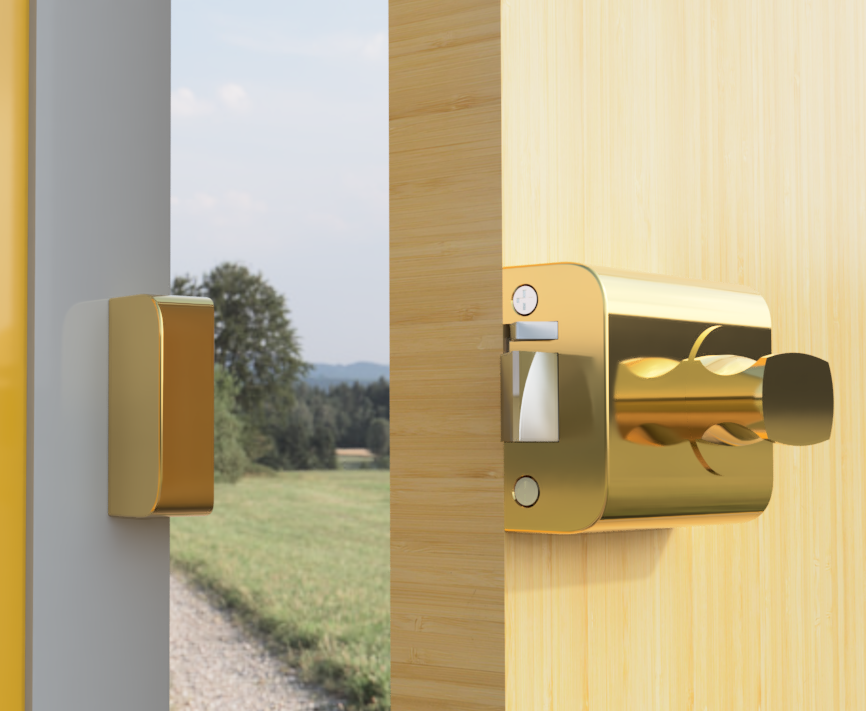
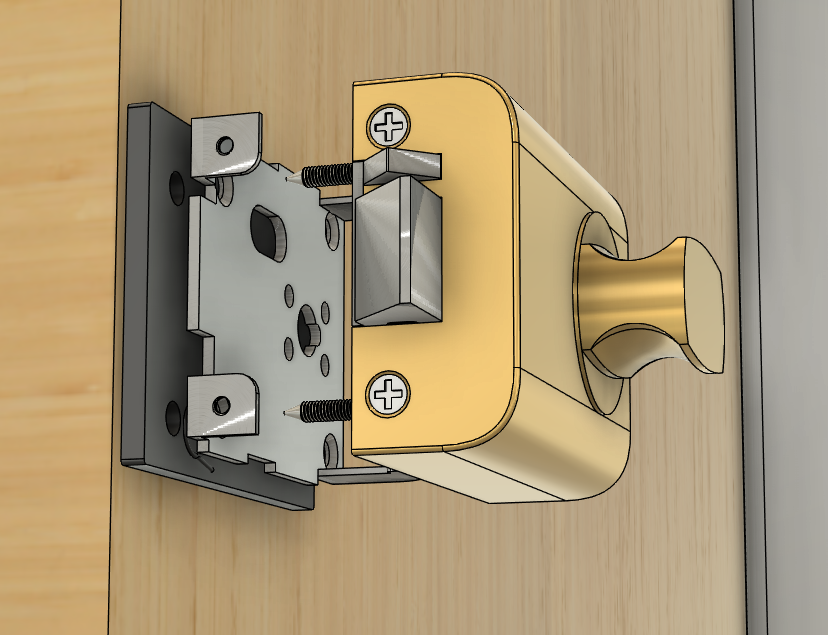
Put the outside cylinder into the hole you just made. Put the backing plate of the lock on the door.

You will use the top cylinder screw holes on the backing plate. Make sure the outside cylinder is the correct way up.
Use a screwdriver to do up the screws.
Do not over tighten these screws.
Put the key in the outside cylinder and turn it 180 degrees, to the upside down position. Insert the large round cam hub into the backing plate, then turn the key back 180 degrees. The tailpiece of the outside cylinder will go through the cutout in the cam hub. Mark the tail piece where it sticks our from the cam hub
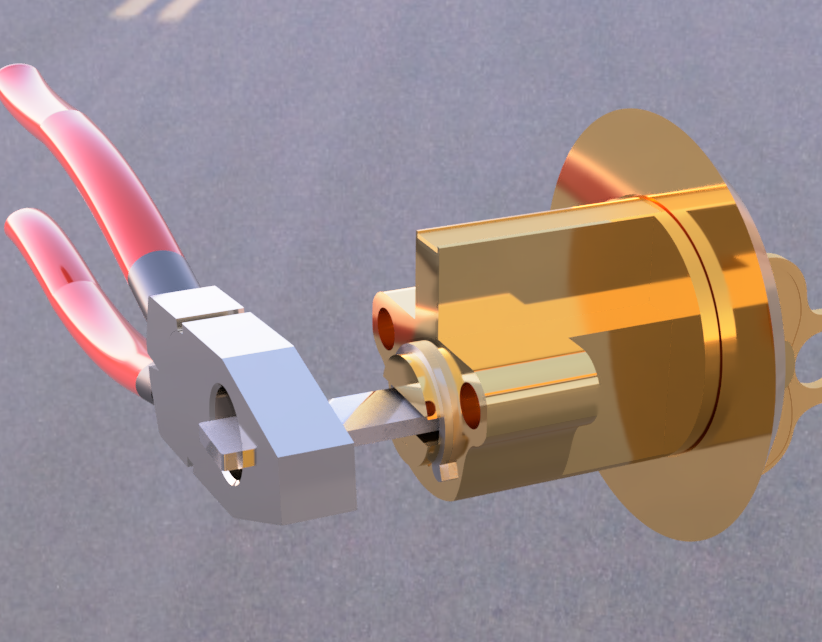
Remove the outside cylinder and cut the tailpiece to length.
Use a pair of pliers to cut the tail piece.
The tail piece should be flush and not stick out from the cam.
Put the outside cylinder back into the door.
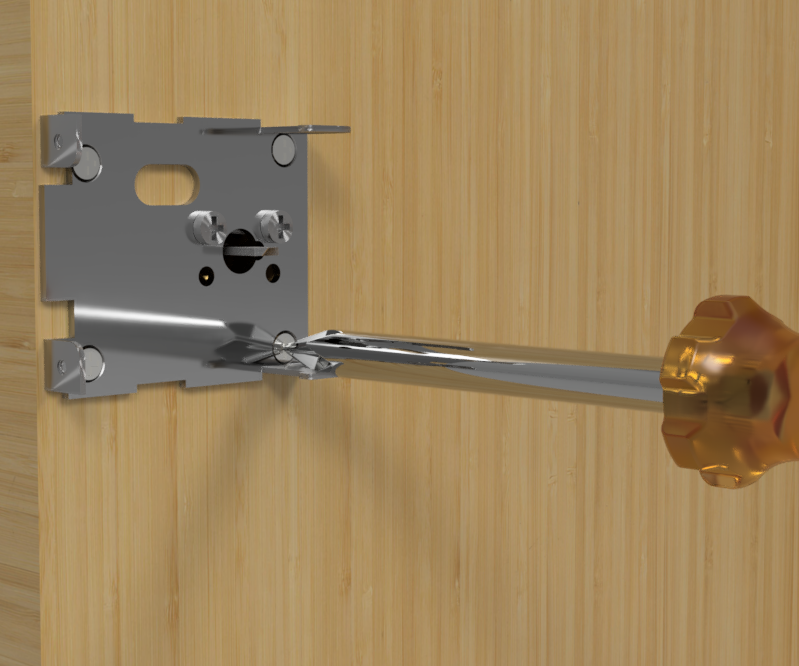
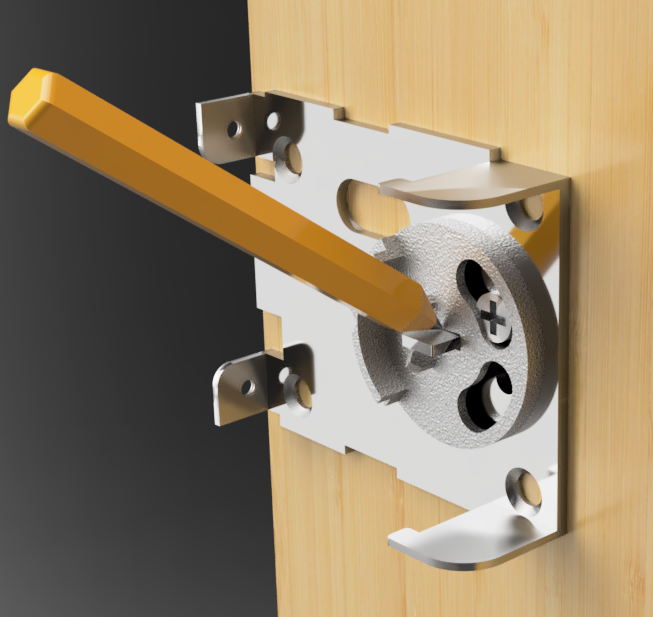
Use the power drill, with a small drill bit, to drill pilot holes for the fixing screws. Install the backing plate with the 4 fixing screws. You can use a screwdriver or a power driver. These screws are countersunk, and you need to make sure they are screwed in fully.

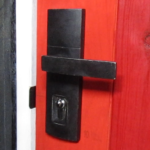
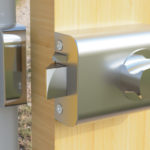
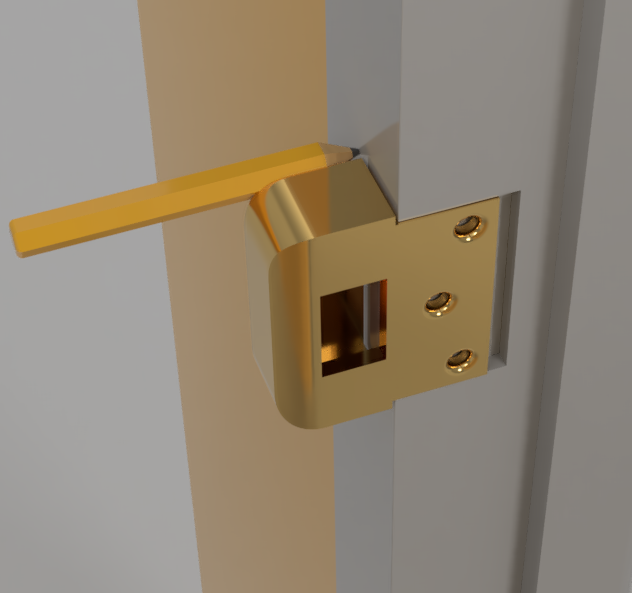
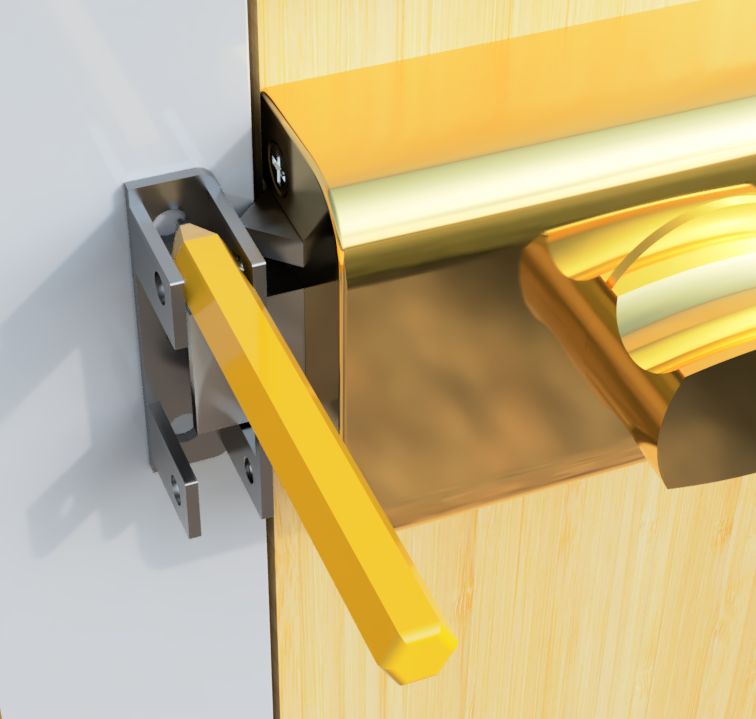
Install the lock case over the backing plate. You may need to turn the knob or push the latch in to get the lock body to slip on. Use a screwdriver to install the 2 lock case screws. Test the lock for proper operation.
Installing the Lockwood 001 Wood Frame Strike
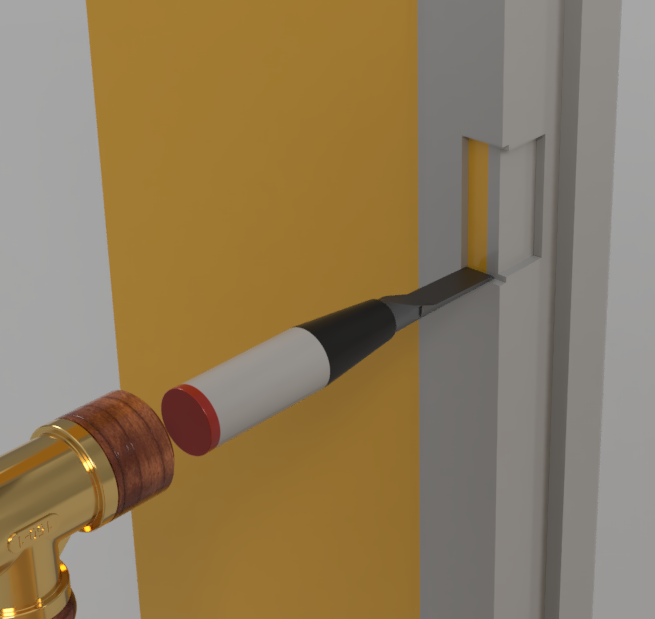
Then we use the strike to mark its position on the door frame. The strike must be centered with the lock. Open the door and use the strike to mark out its position on the edge of the door frame. Remember the strike will be fitted level with the inside of the door, so make sure you mark the correct position. Trace around the edge of the strike to mark the cutout. Use a pencil to mark as close as possible to the strike plate.
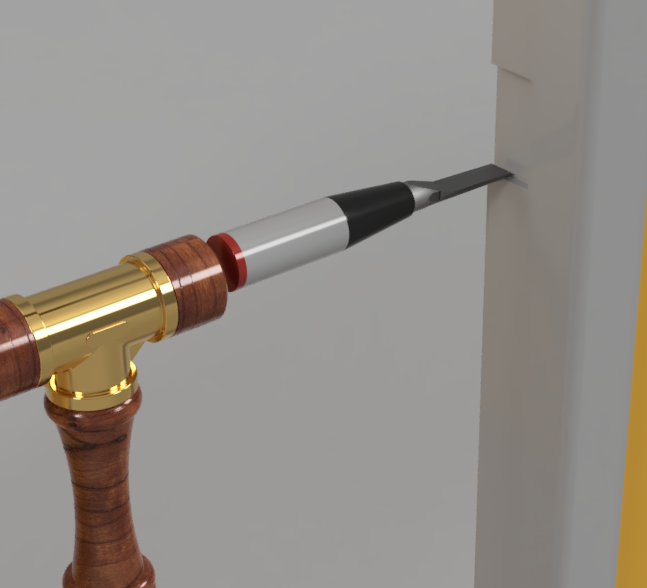
Use a hammer and chisel to make the cut for the strike.
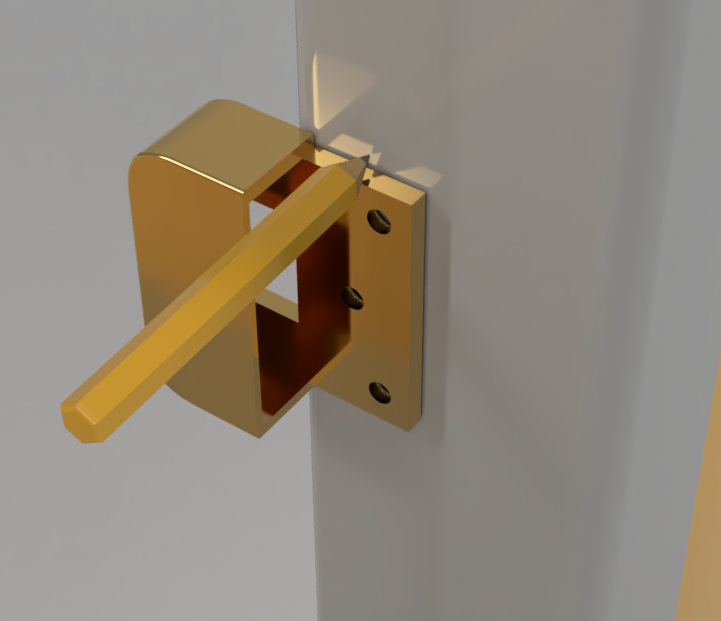
The strike should sit flush with the edge of the frame, and there should be no more then a 3 millimeter gap between the lock and the strike.
Once the edge cut is made on the frame, slide the strike into the cutout. The strike may need to be set into the frame to make it level with the inside of the door. Use a pencil to trace around the top of the strike. Once again trace as close as possible to the edge of the strike.
Remove the strike and use a hammer and chisel to cut out the wood.
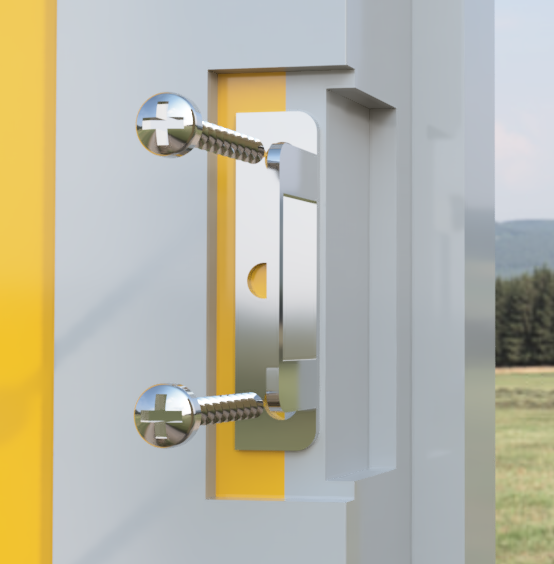
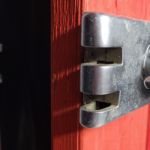
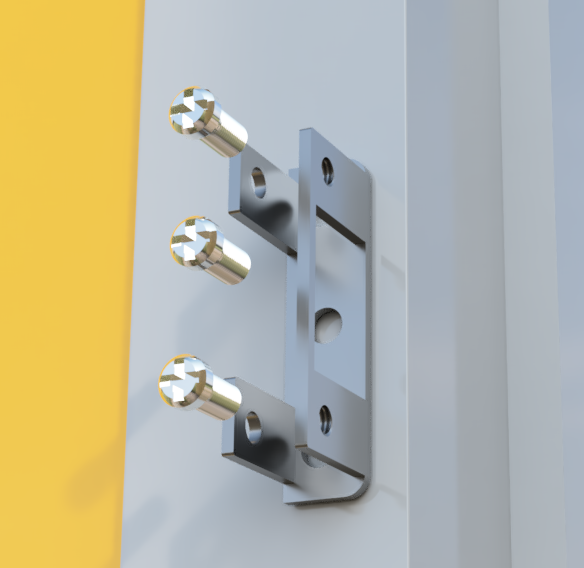
The door frame strengthener is put into position on the side of the door. Centre the door frame strengthener in the cutout. Mark the position for the screw holes with a pencil. Use a power drill, to drill pilot holes for the long door frame strengthener screws. Ensure the pilot hole is not too small, as the long screws will be difficult to install. Put the door frame strengthener into position and use a power driver to install the long screws.
The strike will slide into position over the door frame strengthener. Use a power drill with a small drill bit to drill the 3 pilot holes for the strike face. Once the pilot holes are made, use a power drill or a screwdriver to install the 3 wood screws that hold the strike in position.
Install the Lockwood 001 Metal Frame Strike
We can not mortise in the strike on a metal frame door, so we have to make sure that when the door is closed, it is on the same level as the frame. To do this we have to adjust the height of the lock to match the frame. A packer is used under the lock to adjust the height of the lock. Packers are commercially available, or it is possible to make your own. The packer is put in place when the lock is being fitted. The tail piece of the outside cylinder will be cut longer when using a packer.
With the door closed, put the metal frame strike mounting plate centered in position on the frame. Ensure the mounting plate is set back from the frames’ edge. Account for the thickness of the strike and ensure there is no more then a 3 mm gap between the frame strike and the lock. Mark the screw positions with a pencil.
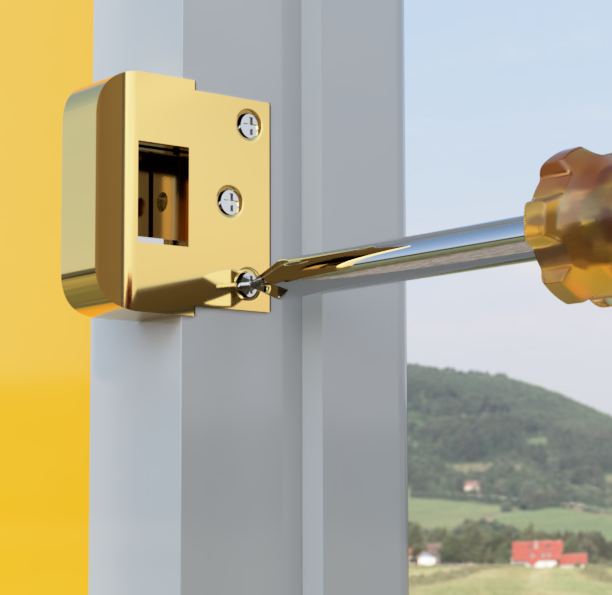
With the door closed, put the metal frame strike mounting plate centered in position on the frame. Ensure the mounting plate is set back from the frames’ edge. Account for the thickness of the strike and ensure there is no more then a 3 mm gap between the frame strike and the lock Mark the screw positions with a pencil. Drill pilot holes for the strike screws. These holes will go through the metal frame. You may be concrete behind the frame you will have to drill through. Ensure you drill deep enough for the mounting screws. Use a power driver to install the 3 metal frame strike mounting screws. The strike, fits over the mounting plate.
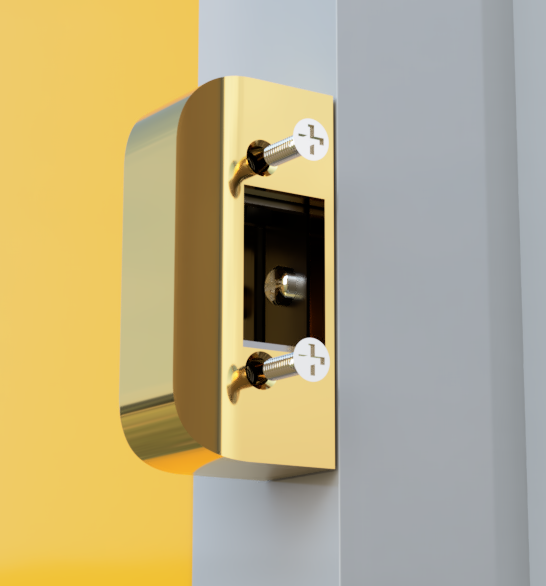
Use a screwdriver to fit the 2 screws that hold the strike to the mounting plate.
The metal frame strike is now installed.
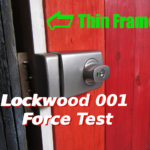
For information on just how much force the Lockwood 001 can withstand, see these two posts. One is testing a Lockwood 001 deadlatch with a 35mm frame. The second post is about testing the Lockwood 001 deadlatch with a 20mm frame. It will give an idea of why this is a popular lock installed on many doors in Brisbane.
You may also be interested in our a digital smartlock version of the Lockwood 001, the Lockwood 001 Touch Plus
If you require any help fitting a Lockwood 001 deadlatch, and you are in Brisbane, you can contact The Lock Mob anytime.
Discover more from The Lock Mob - Toowong - Brisbane - Phone 0422 676 768
Subscribe to get the latest posts sent to your email.